Guide: Instance Creation: Difference between revisions
Jump to navigation
Jump to search
No edit summary |
|||
| Line 2: | Line 2: | ||
<gallery mode="packed-overlay" heights="400"> | <gallery mode="packed-overlay" heights="400"> | ||
File:Launch instance 001.png|'''Step 1:''' | File:Launch instance 001.png|'''Step 1:''' Log in to the bwCloud-OS Dashboard. | ||
File:Launch instance 002.png|'''Step 2:''' | File:Launch instance 002.png|'''Step 2:''' Go to Project → Compute → Instances. | ||
File:Launch instance 003.png|'''Step 3:''' | File:Launch instance 003.png|'''Step 3:''' Specify the desired number of VMs. | ||
File:Launch instance 004.png|'''Step 4:''' | File:Launch instance 004.png|'''Step 4:''' Assign a name. If you create multiple VMs at once, they will be numbered consecutively according to the name you assign them. | ||
File:Launch instance 005.png|'''Step 5:''' | File:Launch instance 005.png|'''Step 5:''' Here you can see the image overview. | ||
File:Launch instance 006.png|'''Step 6:''' | File:Launch instance 006.png|'''Step 6:''' Choose an image (e.g., Debian 12). | ||
File:Launch instance 007.png|'''Step 7:''' | File:Launch instance 007.png|'''Step 7:''' The selected image should appear in the upper area. | ||
File:Launch instance 008.png|'''Step 8:''' | File:Launch instance 008.png|'''Step 8:''' Choose a flavor. | ||
File:Launch instance 009.png|'''Step 9:''' | File:Launch instance 009.png|'''Step 9:''' The selected flavor should appear in the upper area. | ||
File:Launch instance 010.png|'''Step 10:''' | File:Launch instance 010.png|'''Step 10:''' Choose the appropriate network(s). | ||
File:Launch instance 011.png|'''Step 11:''' | File:Launch instance 011.png|'''Step 11:''' You can select the security groups here. This setting can be changed later. | ||
File:Launch instance 012.png|'''Step 12:''' | File:Launch instance 012.png|'''Step 12:''' Select your SSH key. | ||
File:Launch instance 013.png|'''Step 13:''' | File:Launch instance 013.png|'''Step 13:''' Press "Launch Instance". | ||
File:Launch instance 015.png|'''Step 14:''' | File:Launch instance 015.png|'''Step 14:''' After a few seconds, an instance will spawn. You can then log in. | ||
</gallery> | </gallery> | ||
Revision as of 16:03, 21 October 2025
Illustrated Instance Creation
-
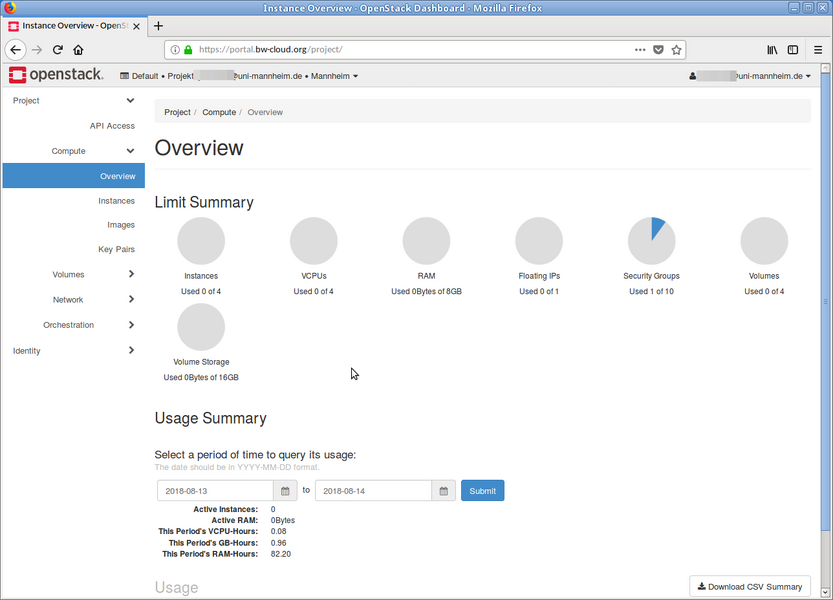 Step 1: Log in to the bwCloud-OS Dashboard.
 -
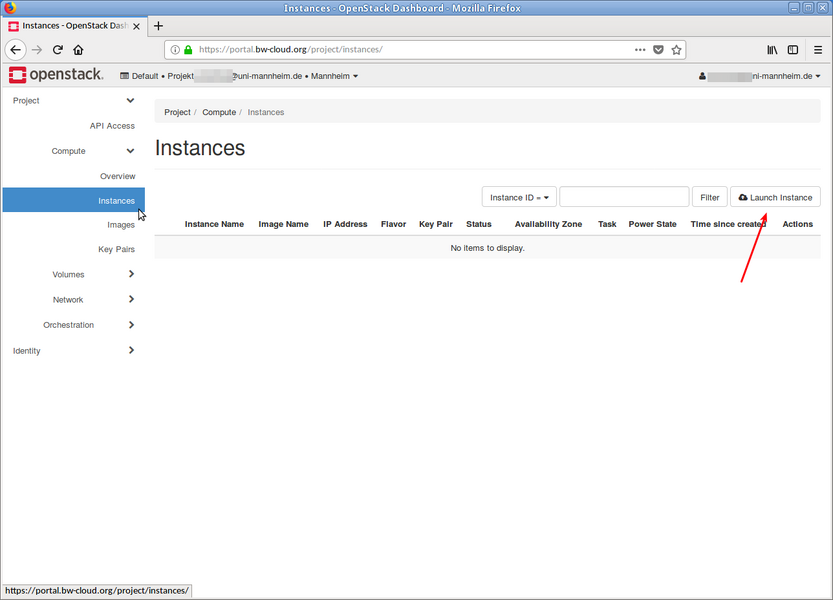 Step 2: Go to Project → Compute → Instances.
 -
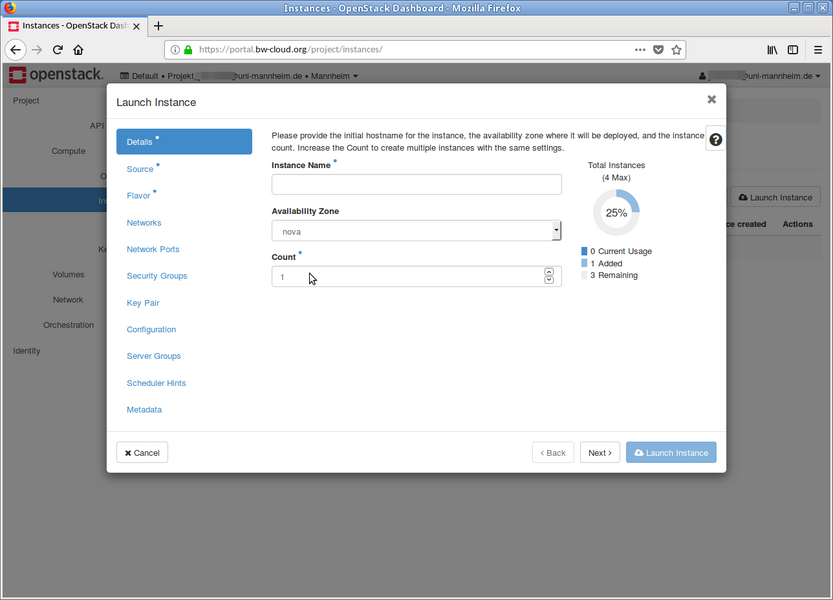 Step 3: Specify the desired number of VMs.
 -
 Step 4: Assign a name. If you create multiple VMs at once, they will be numbered consecutively according to the name you assign them.
 -
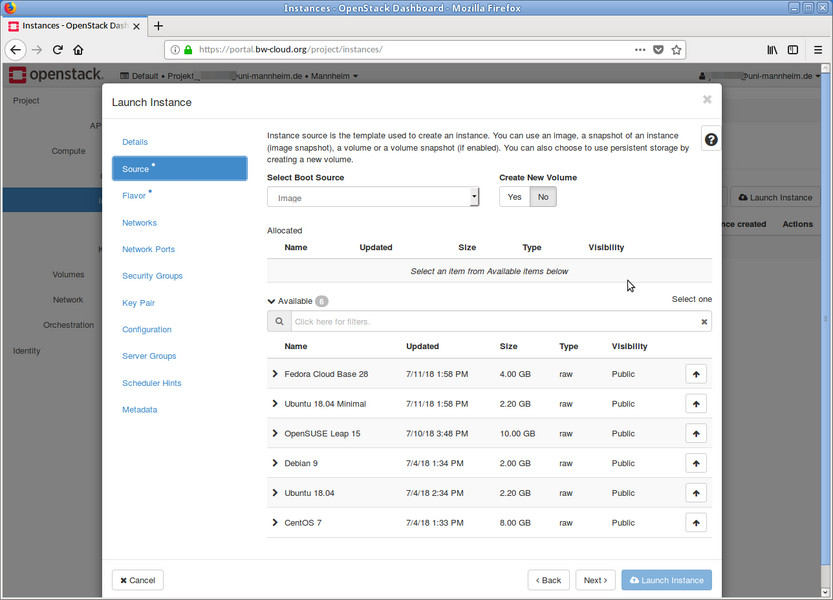 Step 5: Here you can see the image overview.
 -
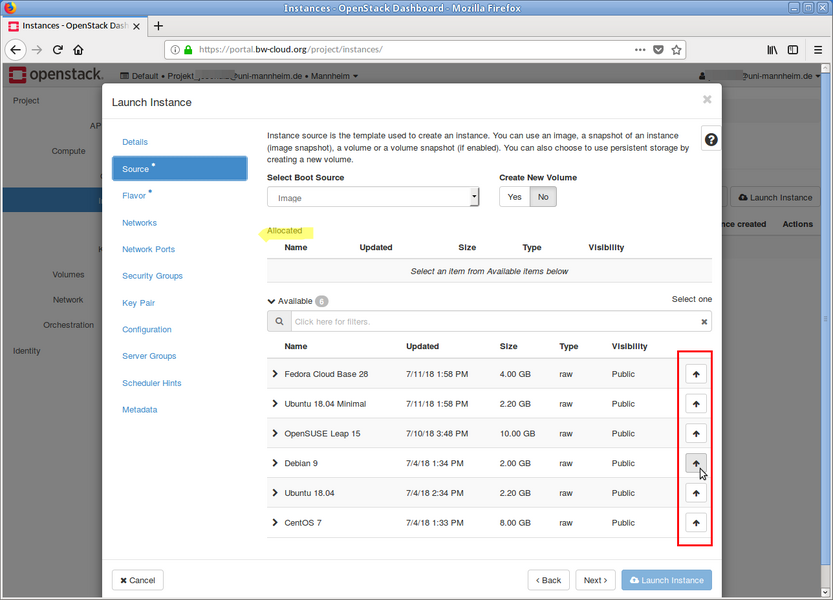 Step 6: Choose an image (e.g., Debian 12).
 -
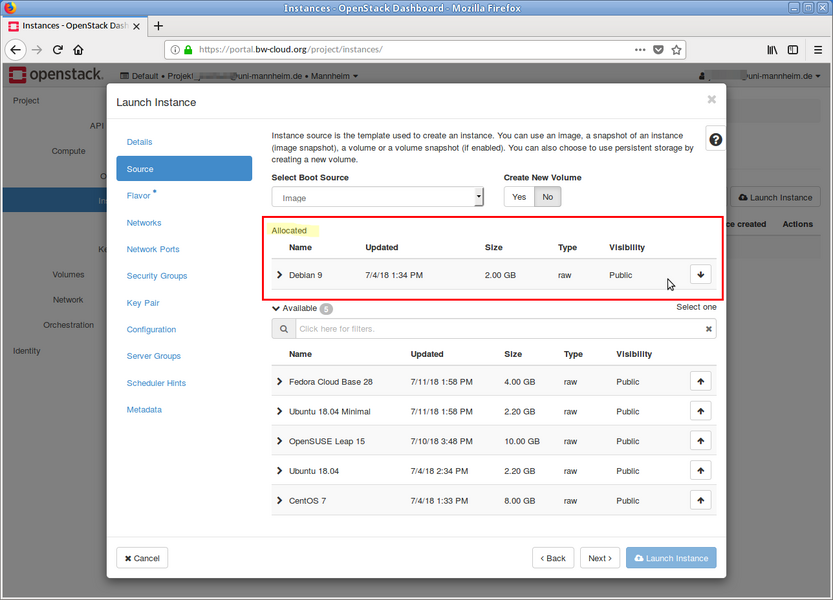 Step 7: The selected image should appear in the upper area.
 -
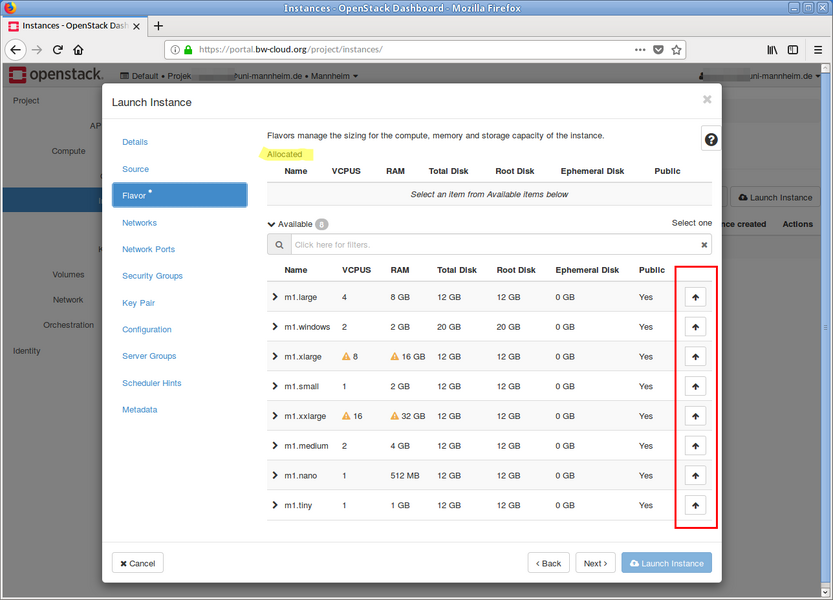 Step 8: Choose a flavor.
 -
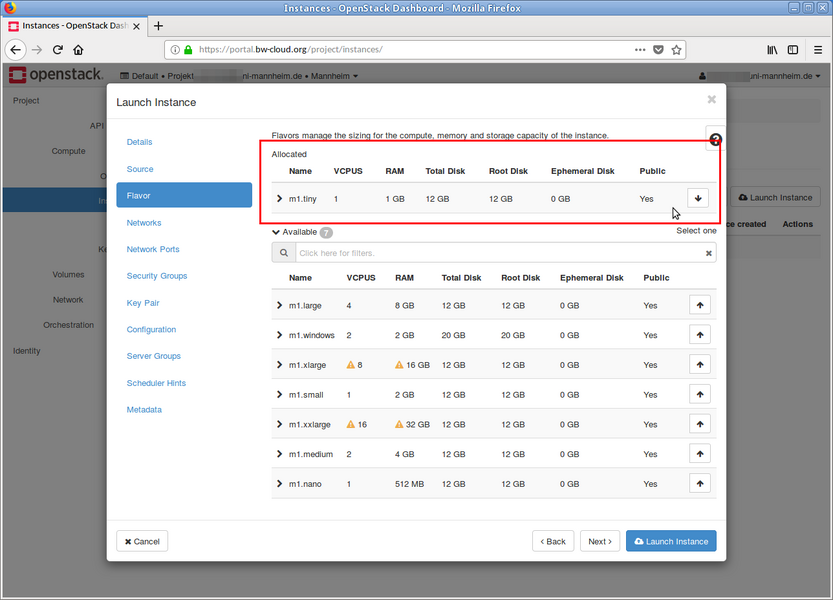 Step 9: The selected flavor should appear in the upper area.
 -
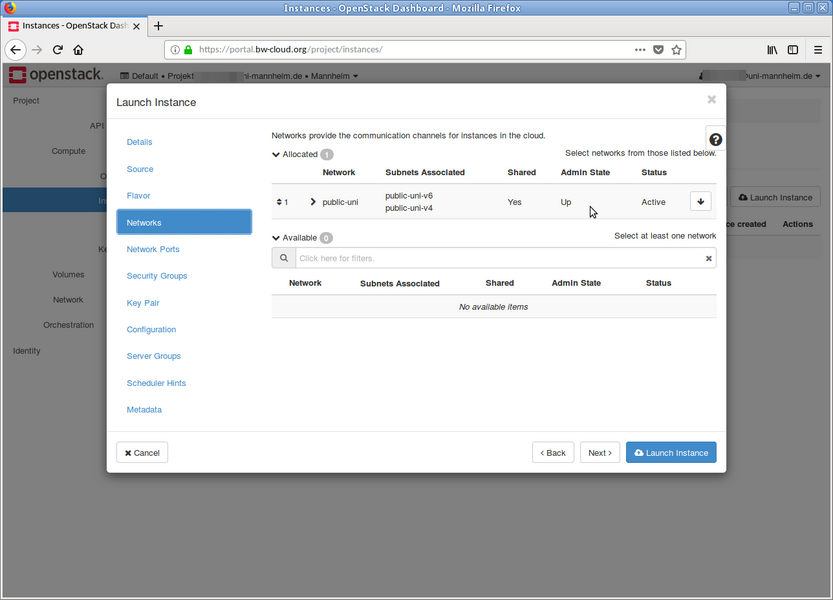 Step 10: Choose the appropriate network(s).
 -
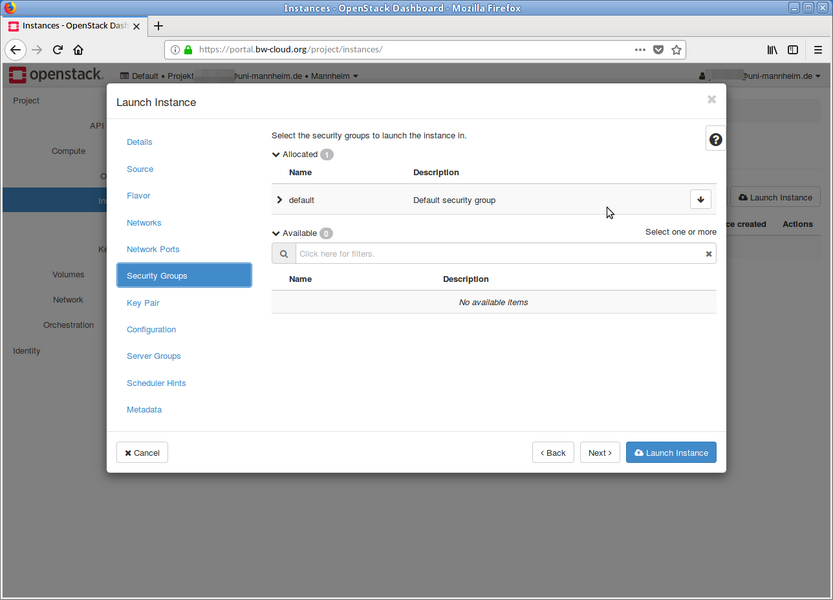 Step 11: You can select the security groups here. This setting can be changed later.
 -
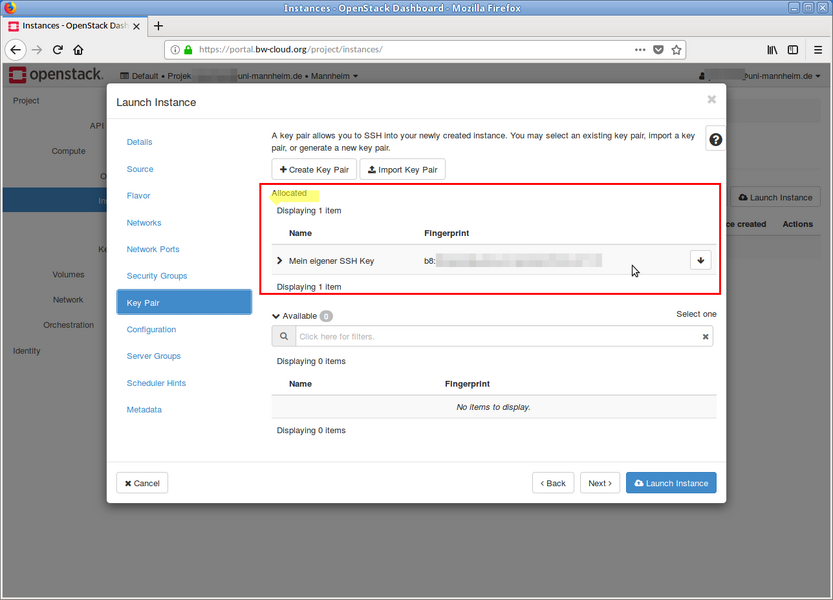 Step 12: Select your SSH key.
 -
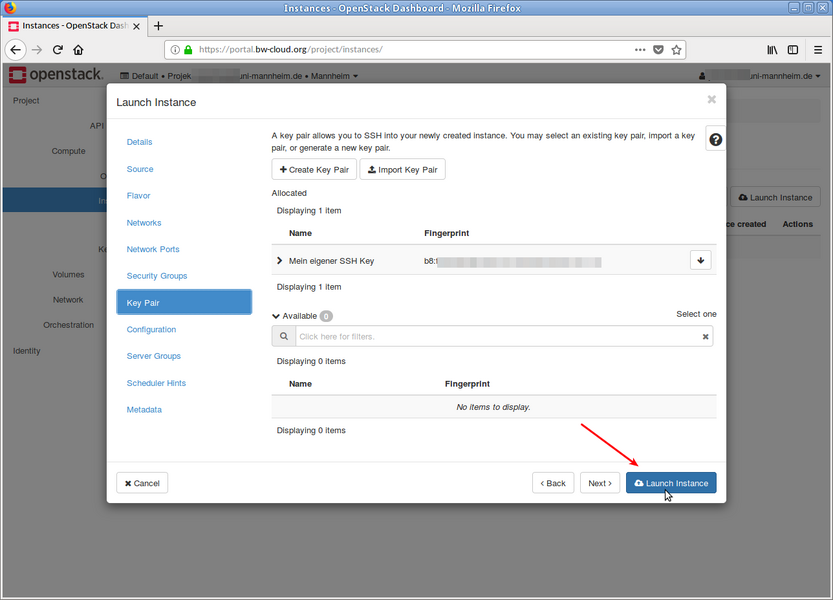 Step 13: Press "Launch Instance".
 -
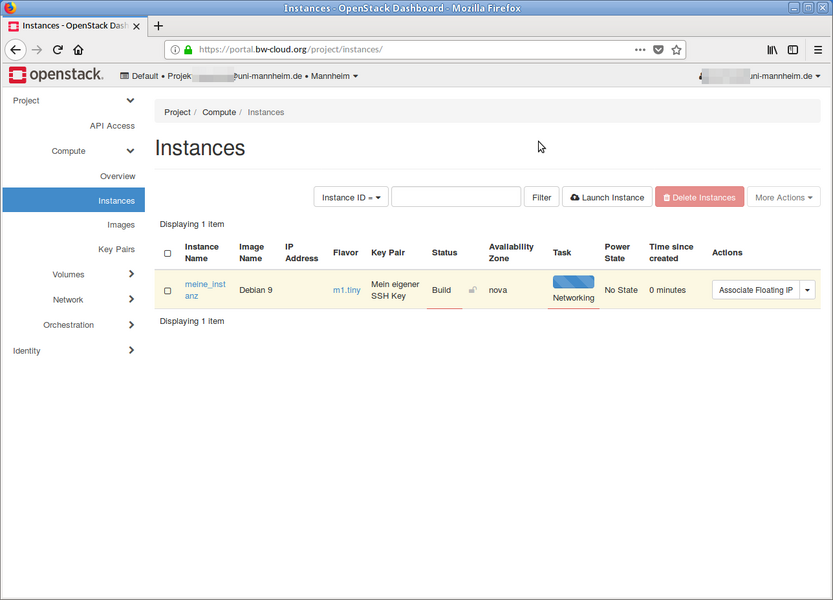 Step 14: After a few seconds, an instance will spawn. You can then log in.


